How to Make Giant Paper Poinsettias
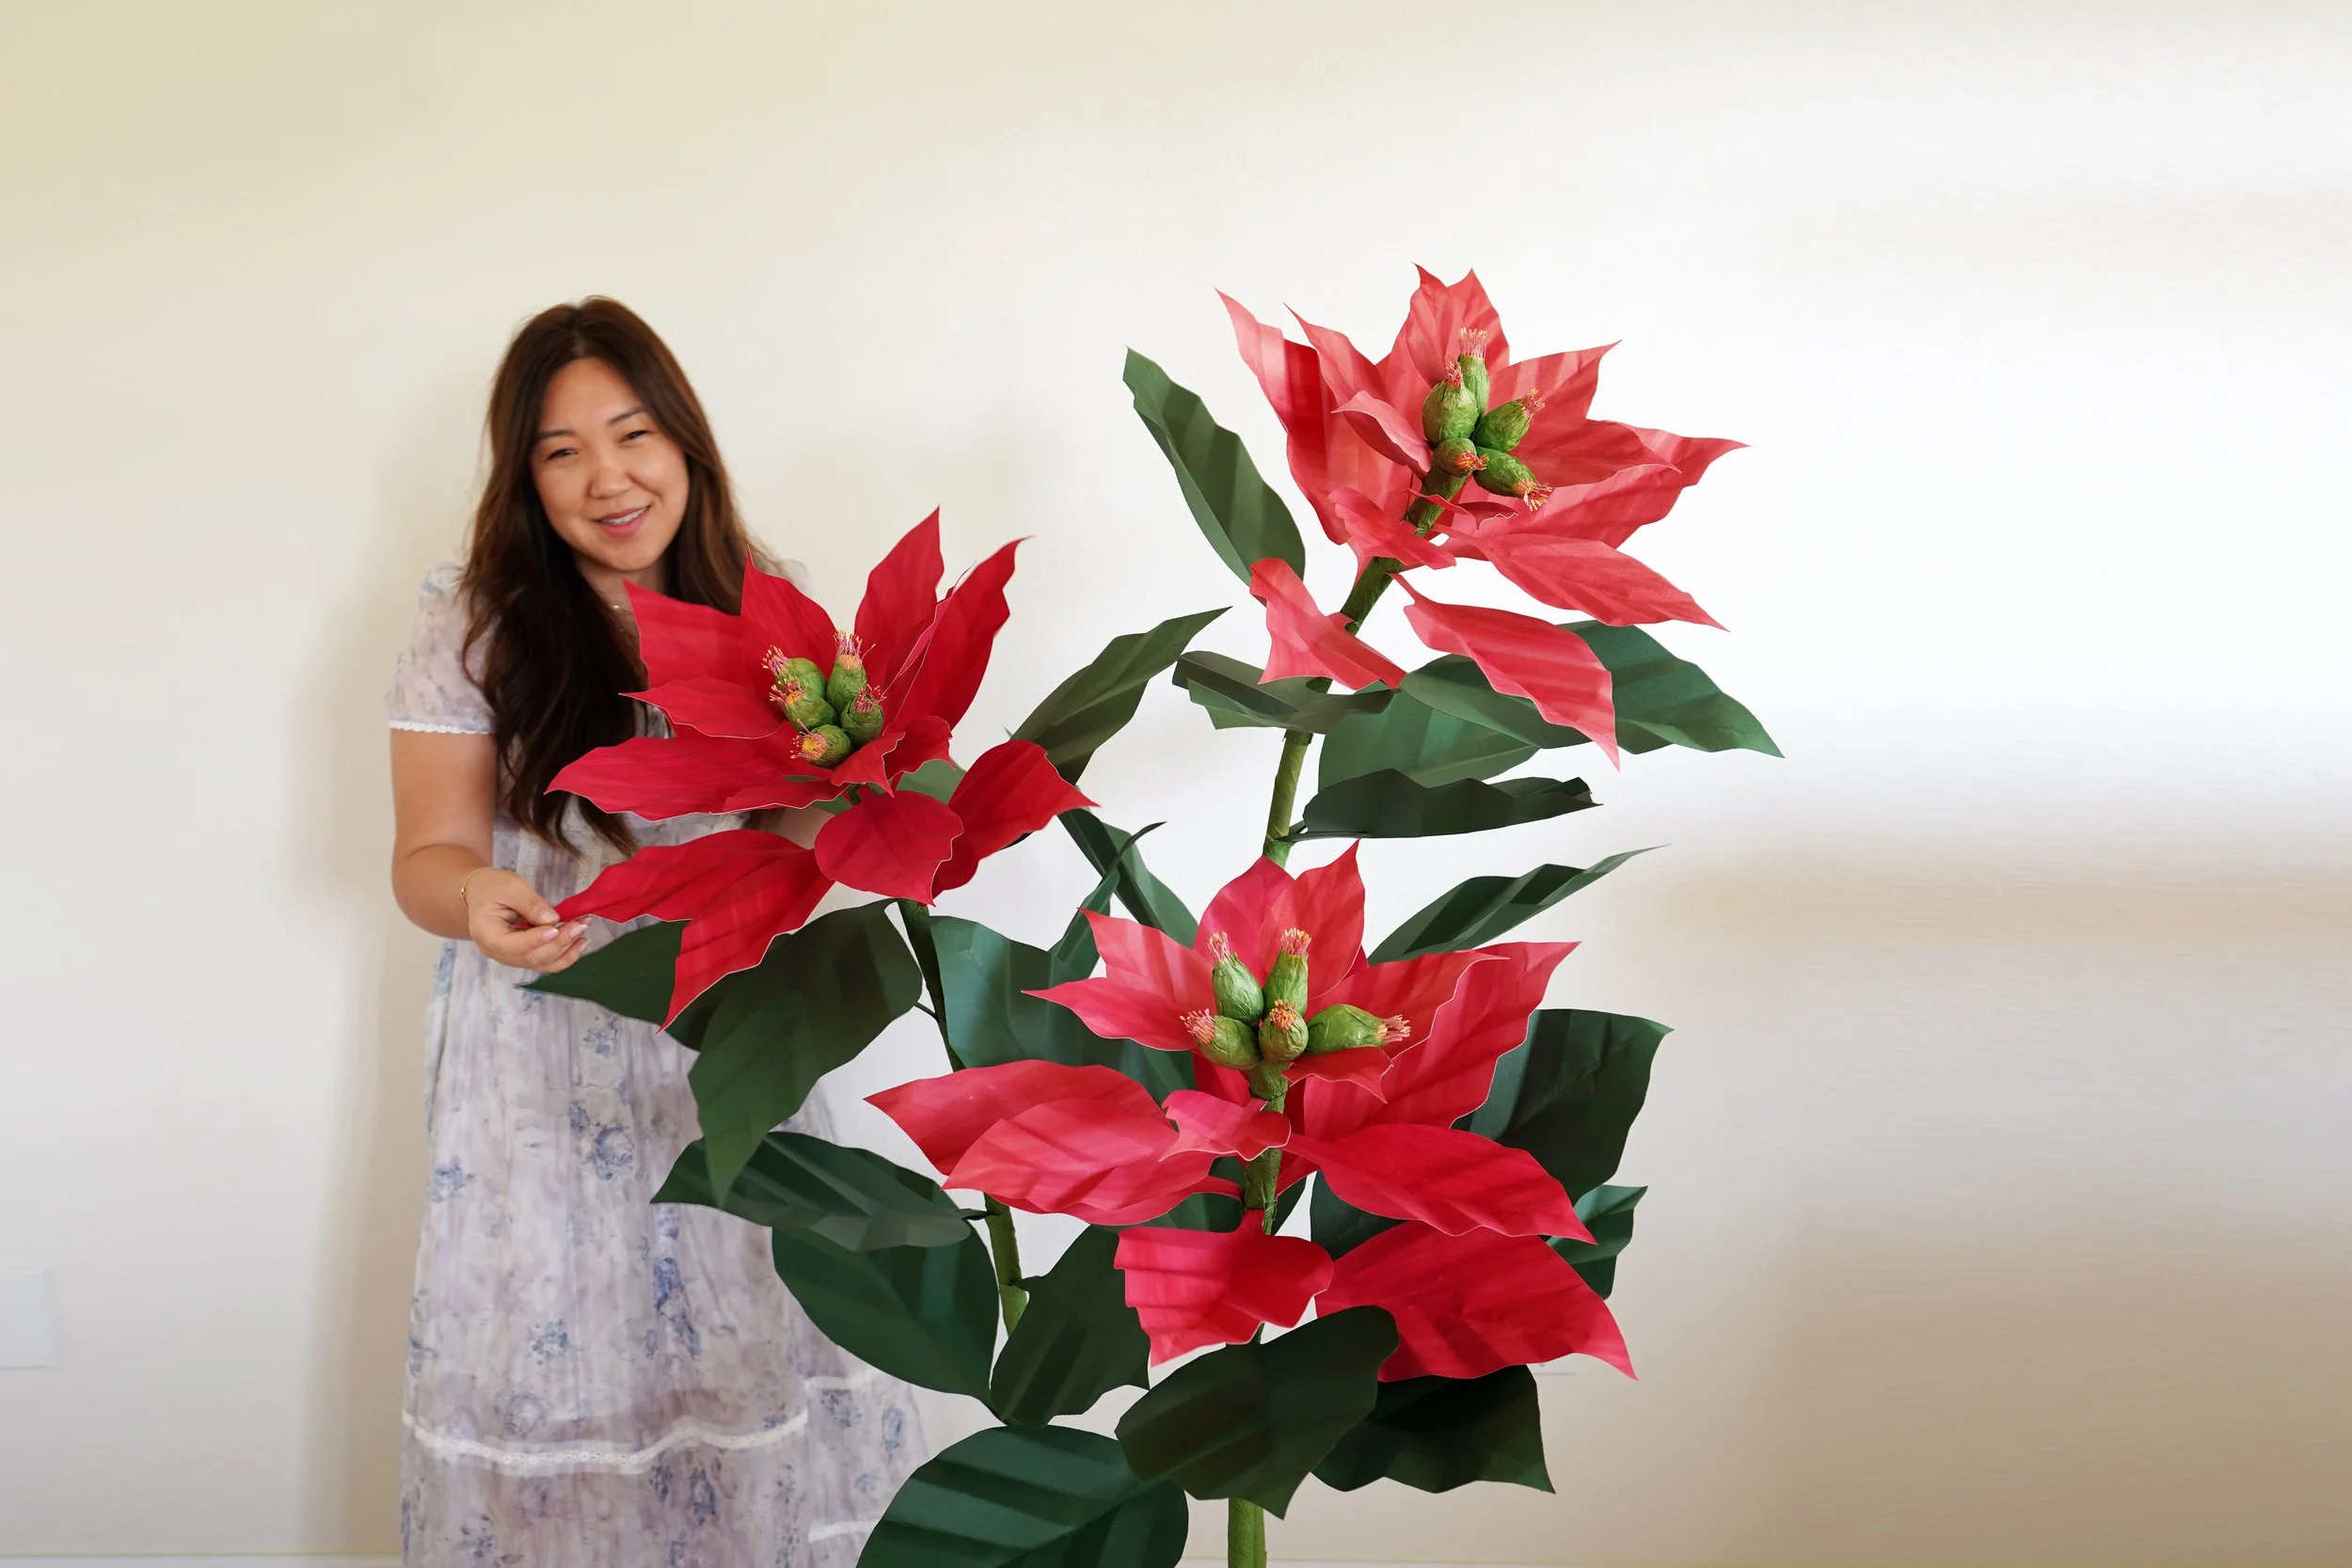
Make a bold holiday statement with these giant paper poinsettias, perfect for holiday recital backdrops, classroom décor, window displays, party photo walls, or a dramatic piece for your entryway. This tutorial shows you how to build the flower (with a Cricut/Silhouette or by hand), create a sturdy stem and cement base, and assemble everything so your poinsettia stands on its own.
Materials & Tools
Template- https://www.handmadebysarakim.com/digital-templates/giantpoinsettia
Giant flower stand and stem kit- https://www.handmadebysarakim.com/shop/stand
PVC Pipe- https://bit.ly/3Ubjchc
Concrete- https://bit.ly/2Xqw4Fe
Tissue Paper white- https://bit.ly/3IKf3K8
Tissue Paper Green- https://bit.ly/3JJaZh4
Tissue Paper Yellow- https://bit.ly/4oShI7t
Red/Green Cardstock Paper (use discount code “SARAKIM10”)- https://www.12x12cardstock.shop/?p=BkRvWGQ5n
Floral Wire- https://bit.ly/4nFvut8
Yellow Acrylic Markers- https://bit.ly/4i9gH80
Green Paper to Wrap Stem- https://bit.ly/4bks6ip
Plastic Bowl- https://bit.ly/3EpwWKL
Duck Tape- https://bit.ly/3fspOoM
Masking Tape- https://bit.ly/3WGpZjj
White Glue- https://bit.ly/38UgoQa
Hot Glue- https://bit.ly/3EhHEVX
Cricut Maker- https://bit.ly/4oIxBgu
Cricut Joy Xtra- https://bit.ly/3LgtvOr
Silhouette Cameo (use discount code “SARAKIM”)- https://www.silhouetteamerica.com/silhouette-cameo-5-alpha
Electrostatic Mat (use discount code “SARAKIM”)- https://www.silhouetteamerica.com/CUT-MAT-ES-WHT-12


Step 1: Cut Your Petals & Centers
You’ll cut five sizes of red petal pieces plus the center fringe shape. Quantities below are for one flower.
Center fringe: Cut 5 pieces (this is the small fringe circle that becomes the tissue-paper center). Also cut the two small red petal pieces that pair with it.
Smallest petal (size 1): Cut 3 pieces. These are the tiniest petals.
Second size (size 2): Cut 3 pieces. You can fit sizes 1 and 2 plus the center on a single sheet if you arrange carefully.
Third size (size 3): Cut 3 pieces — roughly the size of a letter sheet.
Fourth size (size 4): Cut 5 pieces — cut diagonally on letter paper or use 12x12 cardstock to get even larger petals.
Leaves: Cut 5–8 green leaves (heavier green cardstock works well).
If you are handcutting: print the pattern, stack sheets of cardstock (up to 3 recommended), trace or pin pattern, and cut. For the center fringe, handcut fringes as shown in the video — short, even cuts around the circle.


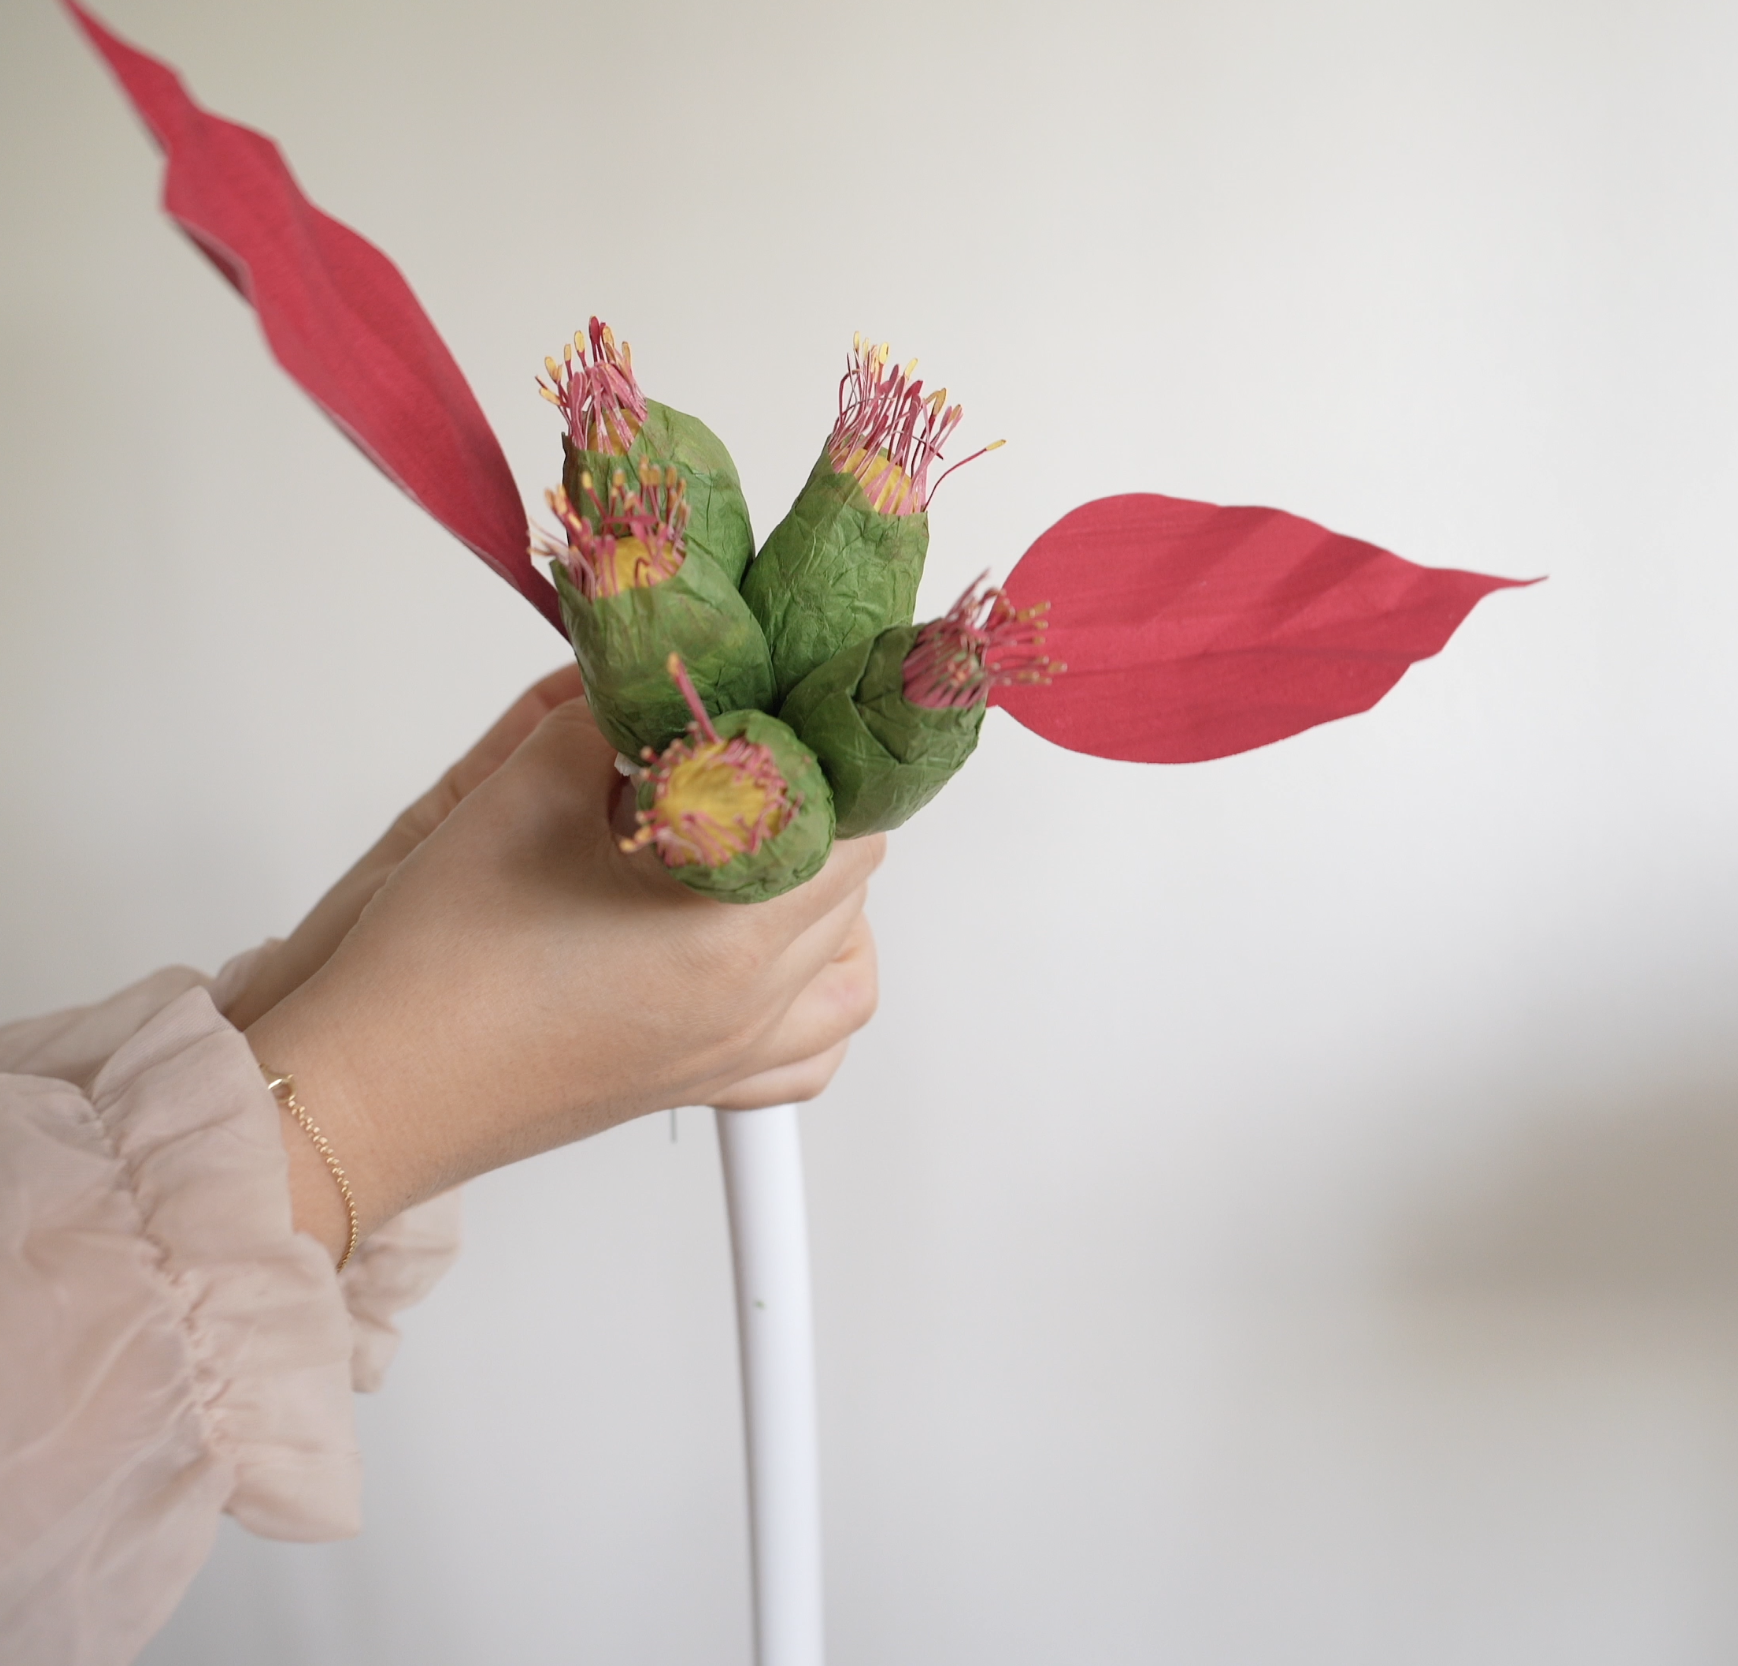
Step 2: Make the Tissue Paper Centers
Crumple one sheet of tissue paper into a fist-sized ball (this becomes the core).
Wrap with a small piece of yellow tissue paper so the center reads bright yellow.
Take the center fringe pieces (you made 5) and add glue to the inner edge of the fringe, then press each fringe piece around the tissue oval so the fringes point outward. Repeat to make five fringe assemblies, these will be stacked inside the smallest petals later.
Add yellow acrylic marker on the tips of the fringe for extra color and realism.

Step 3: Fold & Wire Each Petal
For each petal (all sizes), do the following:
Take one petal and fold it down the middle (doesn’t have to be perfect).
Fan-fold diagonally toward the folded edge to create small accordion/fan folds. When you open it up, the fold lines should form a “V” shape down the center.
Curl the top edges away from you slightly to shape the petal if desired.
Add white glue to the paired backing piece (if using machine-cut paired pieces) and lay a 20-gauge floral wire along the back where it will help hold the petal’s shape. Press and let dry. Hot glue can be used for faster hold.
For the largest green leaves (heavier cardstock), add two wires so they are sturdy enough to support the leaf weight.
Repeat until you have all petals wired: 3 small, 3 second-size, 3 mid-size, and 5 large petals.

Step 4: Prepare the Stem & Base (Cement)
Make the coupler stem insert (so the stem is detachable):
Wrap duct tape around one end of the 3/4" PVC coupler — only on one end — so it fits snugly into the concrete base but can still be removed for transport.
Place the coupler in the center of your plastic plant saucer (this will be your mold). You can use a short piece of PVC inside the coupler to hold it steady as the cement sets.
Mix & pour cement:
Don gloves, mask, and goggles. Use disposable cup(s) to mix small batches of rapid-set cement. I like to work in small scoops (about six scoops in disposable cups) so the mix doesn't set too fast.
Add water gradually while stirring until you reach a pancake-batter consistency. Add or reduce water to fine-tune thickness.
Pour a thin layer to cover the bottom of the saucer, then place the coupler in position and add more mix until the coupler is embedded and the top is just below the coupler edge. Smooth the finish.
Allow to set for the time recommended by your cement instructions (couple of hours for rapid-set; follow manufacturer guidance).
Safety note: Clean up and dispose of cement tools as advised; do not reuse kitchen utensils.
If you want a custom-shaped PVC stem:
Tape one end of the PVC pipe with duct tape (to prevent sand from spilling).
Use a funnel and ladle to fill the pipe with heated playground sand — enough so the pipe can be shaped without kinking. Heat the sand in a pan until it’s too hot to handle, then carefully ladle into the pipe. Seal the other end with duct tape.
Shape the pipe on the ground into the desired curve or form. Use a heat gun or blow dryer to warm the pipe from the outside (the heated sand helps the pipe shape evenly).
Once shaped, remove the sand by opening the taped end and pouring sand out. (This yields a shaped pipe that holds the curve.)
Slide the pipe into the coupler in the cement base — it should fit snugly.
If you prefer simple straight stems, use a straight PVC segment cut to length and slide into the set coupler.

Step 5: Assemble the Flower on the Stem
Tape the tissue-paper center to the top of the pvc stem with masking tape so it sits centered.
Take the 3 smallest red petals and tape them evenly around the tissue center with masking tape. Space them evenly in a circle.
Wrap a strip of green crepe paper (2–3" wide, stretched) around the taped area and glue or press to cover the masking tape for a neat finish. Secure the crepe paper with glue or tape on the underside.
Move 2–3 inches down the stem and tape the next set of 3 petals, rotating them so they sit between the first three petals. Wrap the stem again with crepe paper to hide tape.
Repeat for the third set of 3 petals and then add the set of 5 larger petals near the topmost area, spreading them so the bloom looks full. (You can add 3 then 2 on the next level, as you prefer.)
Add the green leaves: place the first 3 leaves just below the top petals, then add the remaining leaves further down the stem to balance the look. Add more red petals or leaves if you want the stem more filled out.
The full, pre-arranged cutting template (Cricut/Silhouette + printable handcut version) and my recommended supplies are available on my website https://www.handmadebysarakim.com/digital-templates/giantpoinsettia If you want pre-made metal backdrop stands or prefer not to DIY the base, I have those available on the site too here- https://www.handmadebysarakim.com/shop/stand Find the full tutorial above.
Happy Holidays - Sara Kim